GD50 Lecture 03 - Match 3
This is part of a series where I talk about how I approach the assignment portion of the GD50 lecture. These are written so that I can review them in the future without going through the code! Since this is an assignment, I won’t be posting the code unless it is not related to the assignment. If you are stuck at one of these assignments, these posts should contain enough information to help you progress. Feel free to let me know if there is an error. :)
On the last episode of GD50, we took a look at anonymous functions (a function without a name), tweening, timer library, chaining event together, and palette (using a limited amount of colour for a more consistent look). Can the author use what he learnt to tackle the assignment of Match 3? Let’s find out.
- Time addition on match
- Different tile pattern on later level
- Shiny tiles that destroy entire row
- Reset board when there is no match
- Adding mouse input
Time addition on match
The first task in the assignment is to increase the timer by 1 second for every matched tile.
In PlayState.lua, we already have a for loop that goes through all the matches and calculates the scores based on the number of matches. We can just “piggyback” on this and add one line of code in this loop to increase the timer by 1 second for each tile in matches.
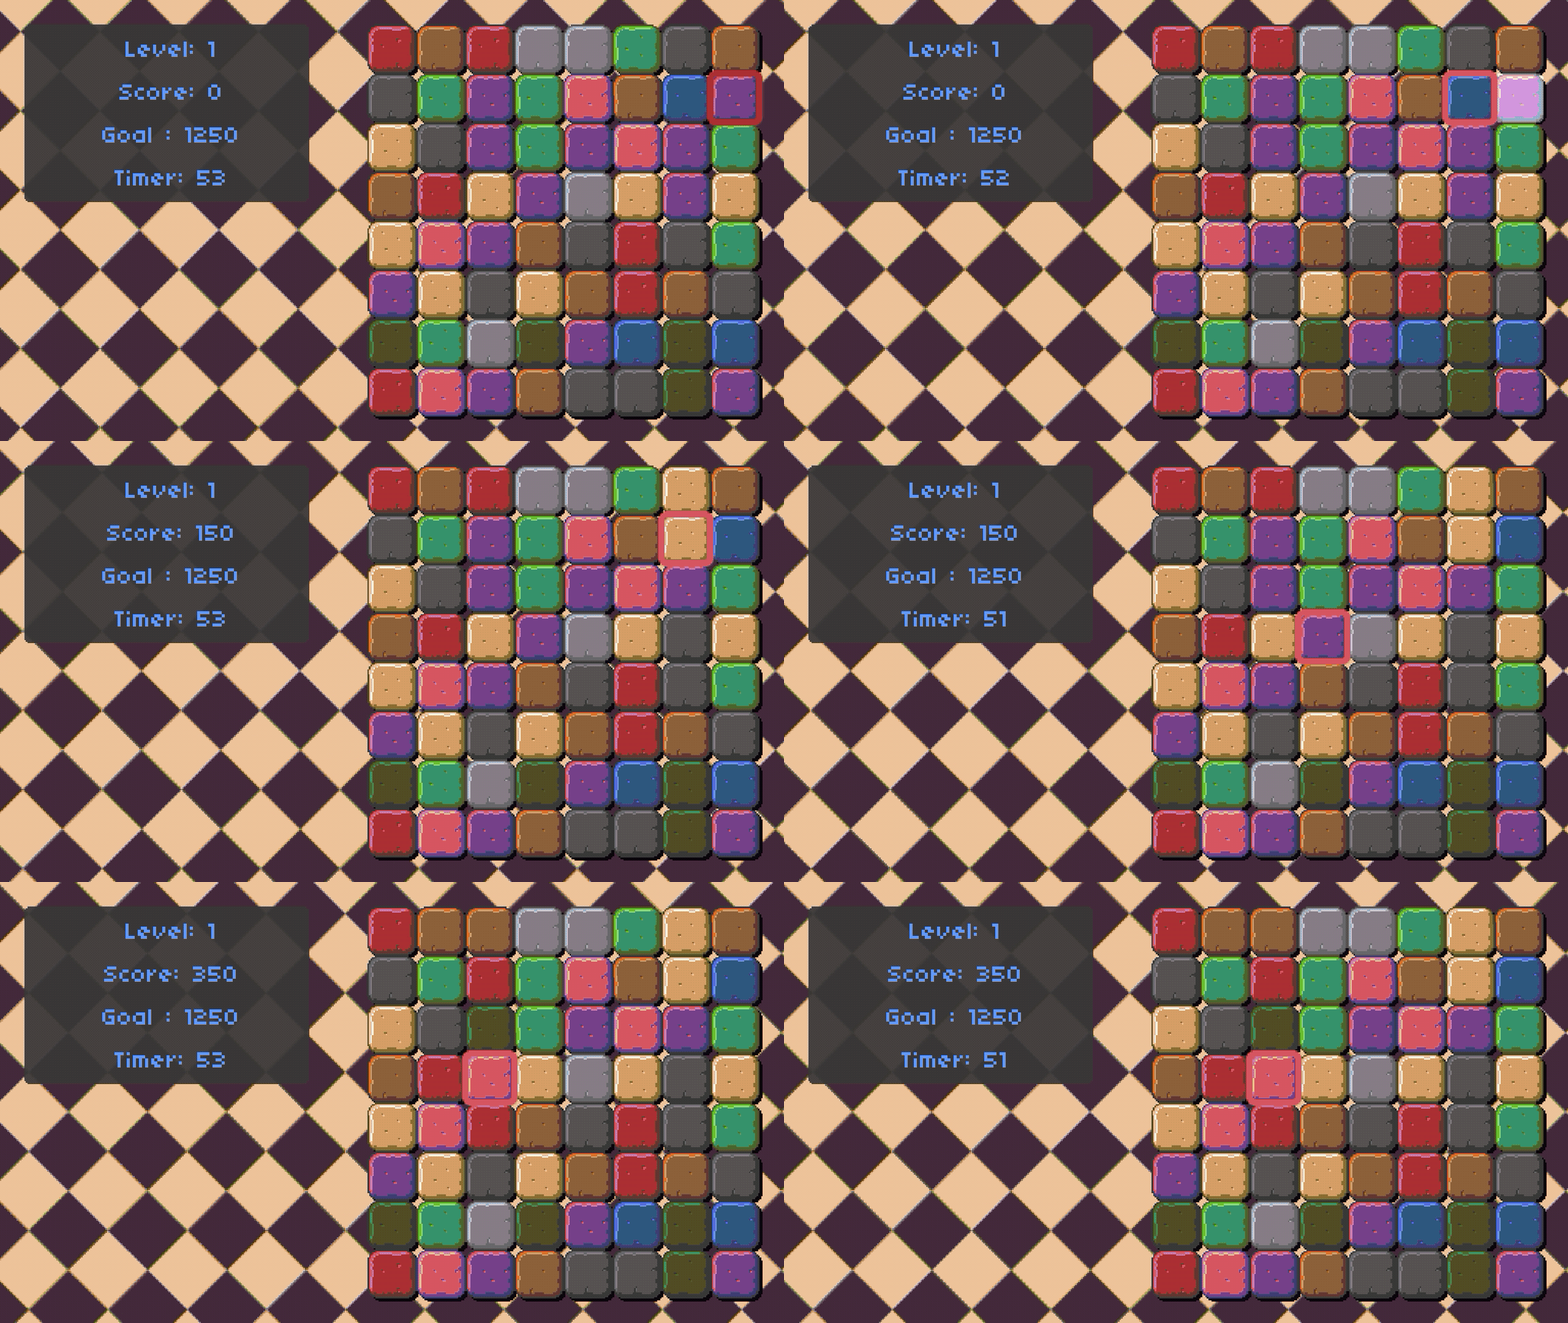 Timer increasing by 1 second for each matched tile
Different tile pattern on later level
Next up, we add some different tile patterns to the mix to get a sense of level progression. The first level will only contain the flat tile (no pattern). After that, a new pattern will be generated for every new level but you can implement this differently if you want! And the new tile pattern will also worth more points!
Since we generate tiles based on the level now, Board class will store a new variable - level. This variable will be used in the function Board:initializeTiles as this is where we choose the tile patterns. There are only six patterns in the spirit sheet, so math.min() can be used to limit the choice. And with the combination of math.random(), you should be able to achieve your desired implementation.
Outside of the Board class, remember to pass in the current level as a parameter whenever we initialize a board. To change the scoring system, we can revisit the for loop in task 1 and work from there. In my implementation, each new pattern increases the score by 50. Something that I almost missed is to make sure that the replacing tile will also have pattern based on the level, so be sure to check for that as well.
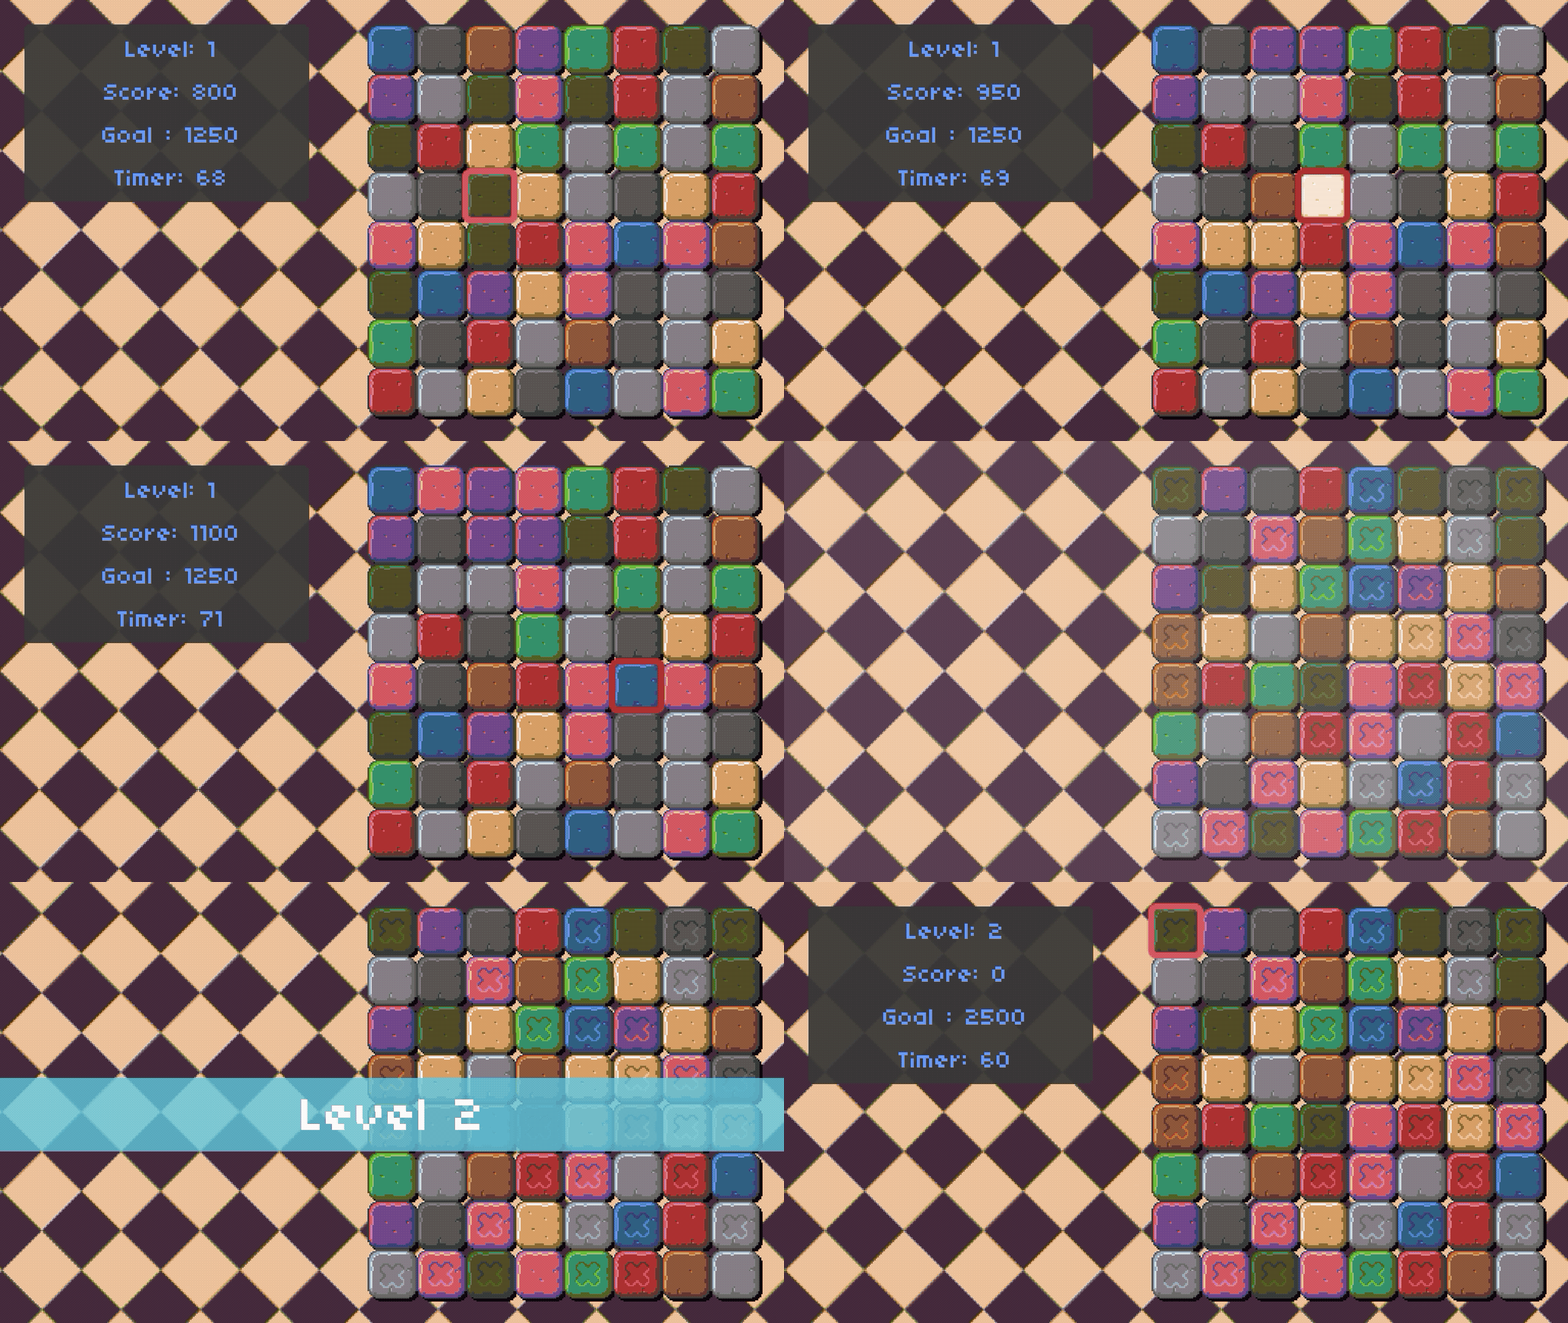 New tile pattern for new level
Shiny tiles that destroy entire row
 Original sprite sheet
Shoutout to Buch that provided these awesome sprites for all these assignments, check him out here.
I started out by creating custom sprite so that I could blend it together with the tile to make it appears shiny. That ended up looking terrible, so I abandoned that approach. Instead, I ended up sacrificing one of the tile patterns, and turn it into a shiny tile by painting the pattern with yellow colour. I also used this opportunity to get rid of some of the colours that look very similar (I am looking at you, pink and slightly lighter pink). The reduced amount of tile colours also make sure that the board will have more matches for the player, everybody wins! Here is what the updated sprite sheet looks like:
 Updated sprite sheet
This has slightly more work, so let’s break it down:
- Add a boolean to the
tileclass to mark it as a shiny tile or not - Change the
initfunction of thetileclass to randomly spawn shiny tile - Change the ‘render’ function to render the shiny tile
- Create a new table
tilesPositioninBoardclass to keep track of the matched tiles’ position - Write a new function in
Boardclass that will add all the tiles that is on the same row as the shiny tile - Give player more points for matching the shiny tile in
PlayState
Before I get into why I did it this way, let’s talk about how matched tiles are removed from the board. In our code, Board:calculateMatches function will go through all the tiles on the board every frame and try to find if there are any matched tiles (3 in a row or more). The matched tiles will be added to a table called match, and all the match tables will then be added to a single table - matches. After that, our Board:removeMatches will loop through matches and remove all tiles by setting them to nil.
Since we already have a Board:removeMatches function that will remove everything in matches, all I need to do is write a function to add all the tiles that I want to remove into matches. This new function will take matches as a parameter, then loop through all the tiles to check if they are special. If it is indeed a special tile, all tiles on the same row will be added into matches so that they can be removed!
We would want to avoid adding the same tile twice into matches because the score of the matches tiles will be calculated twice later on! To do this, we would have to check all the tile’s position in matches to see if it already exist before adding it again. But it seems to be rather inefficient to loop through matches everytime we wanted to add a tile into it, and that is where the new table tilesPosition comes in handy!
Board:calculateMatches function is already looping through all the tiles to check if there are any matches and add them to matches. So we can be a little more efficient by recording the position of a tile into tilesPosition whenever the tile is being added to the matches. Now, we will only have to look into tilePosition table to check if a tile has been added to matches instead of looping matches over and over to check it. To check if a table contains a certain element, you can take a look at this.
Pheww.. That was much longer than I expected. I hope the explanation of my approach is clear enough!
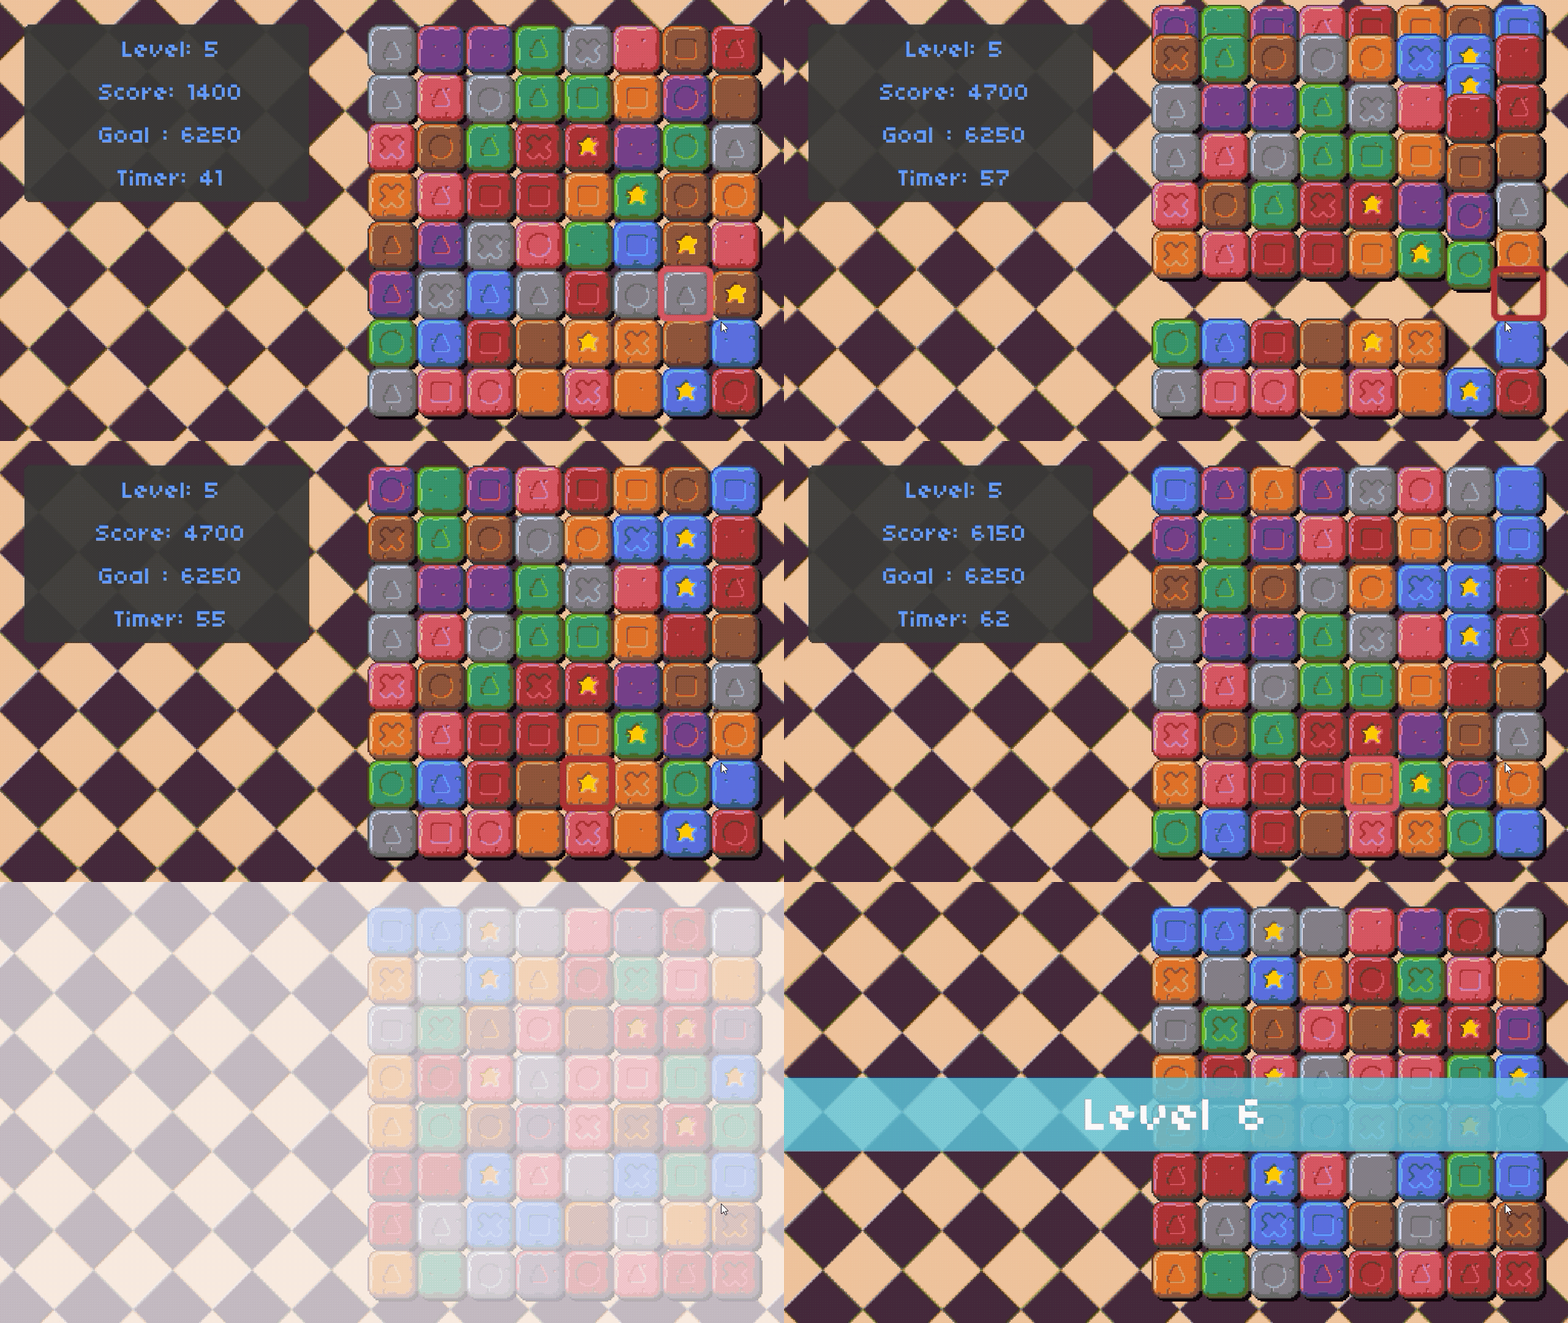 Shiny tile destroying entire row
Reset board when there is no match
The first thing we need to implement for this task is to only allow swapping tiles to happen if there is a match. In the PlayState:update function, there is a section of code that is responsible for swapping the tile. We can use board:calculateMatches to check if there are any matches after swapping the tiles. If there is none, we simply swap the tiles back.
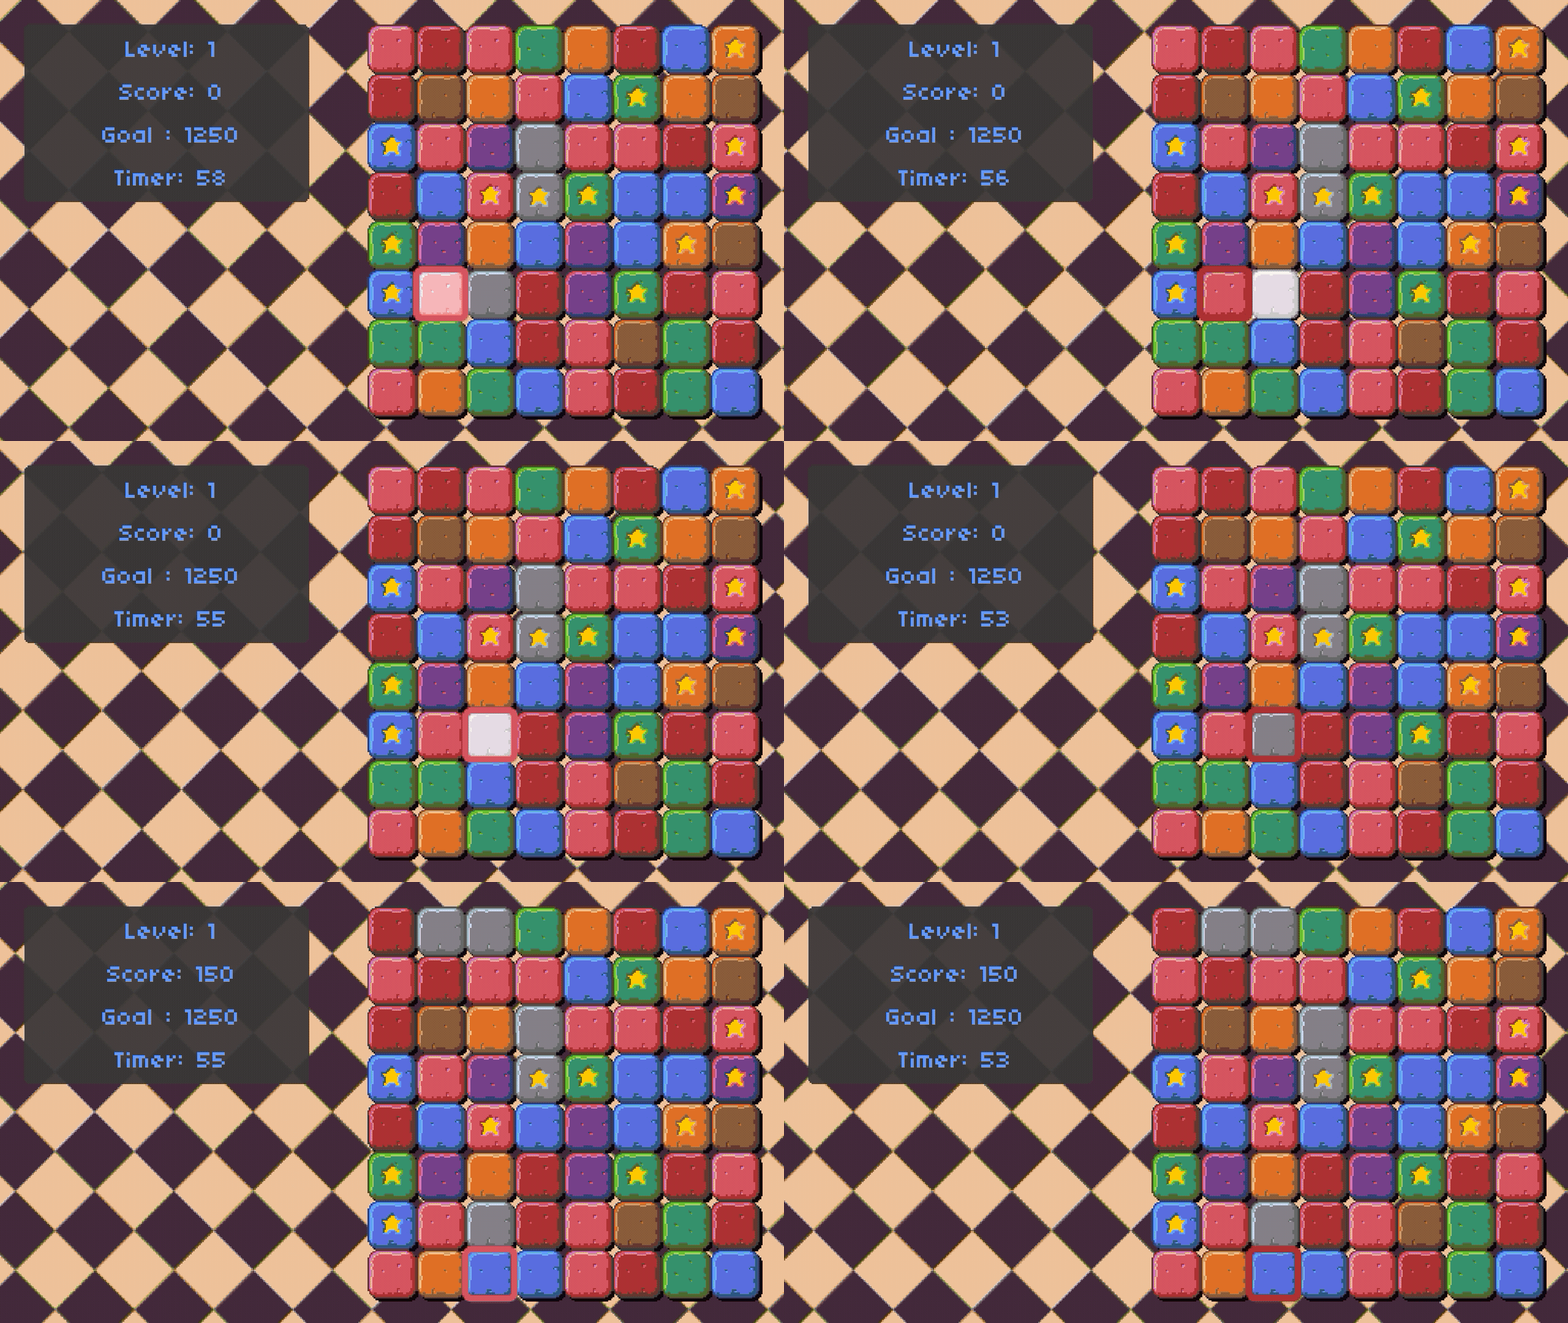 Only allow swapping when there is a match
After implementing that, the board now has a chance to contain no matches at all, that is why we will need to make sure the game will reset the board when this happens. First, we can create a function board:possibleMatches in the board class that will iterate through all tiles to swap them and check for possible matches. This function will start by swapping the first tile to the right first, and board:calculateMatches function will be used once again to check if there is a match after the swap. If there is indeed a match, board:possibleMatches function will immediately return true. If there is no match, it will swap the tile back.
Once the tile has been swapped back, we will need to swap the tile downward as well, and it is pretty much the same thing afterwards. This is no need to swap left and up because it has been covered by swapping right and down (Swapping the first tile to the right = swapping the second tile to the left)! Another improvement you can make is by only swapping the colour of the tile only instead of the positions. Since board:calculateMatches function only use the colour to determine if there is a match, there is no point in swapping the positions. After all the tiles have been swapped and there is indeed no match available on the board, board:possibleMatches function will just return false.
When board:possibleMatches return false, the game will reset the board by re-creating a new board! To make the experience a little bit more smooth, I added a pop up to notify the user if the board has no possible match and it will reset. While it is resetting, all inputs are disabled as well. One final touch I put is to tween all the newly generated tiles and create the illusion that the tiles are falling down after resetting.
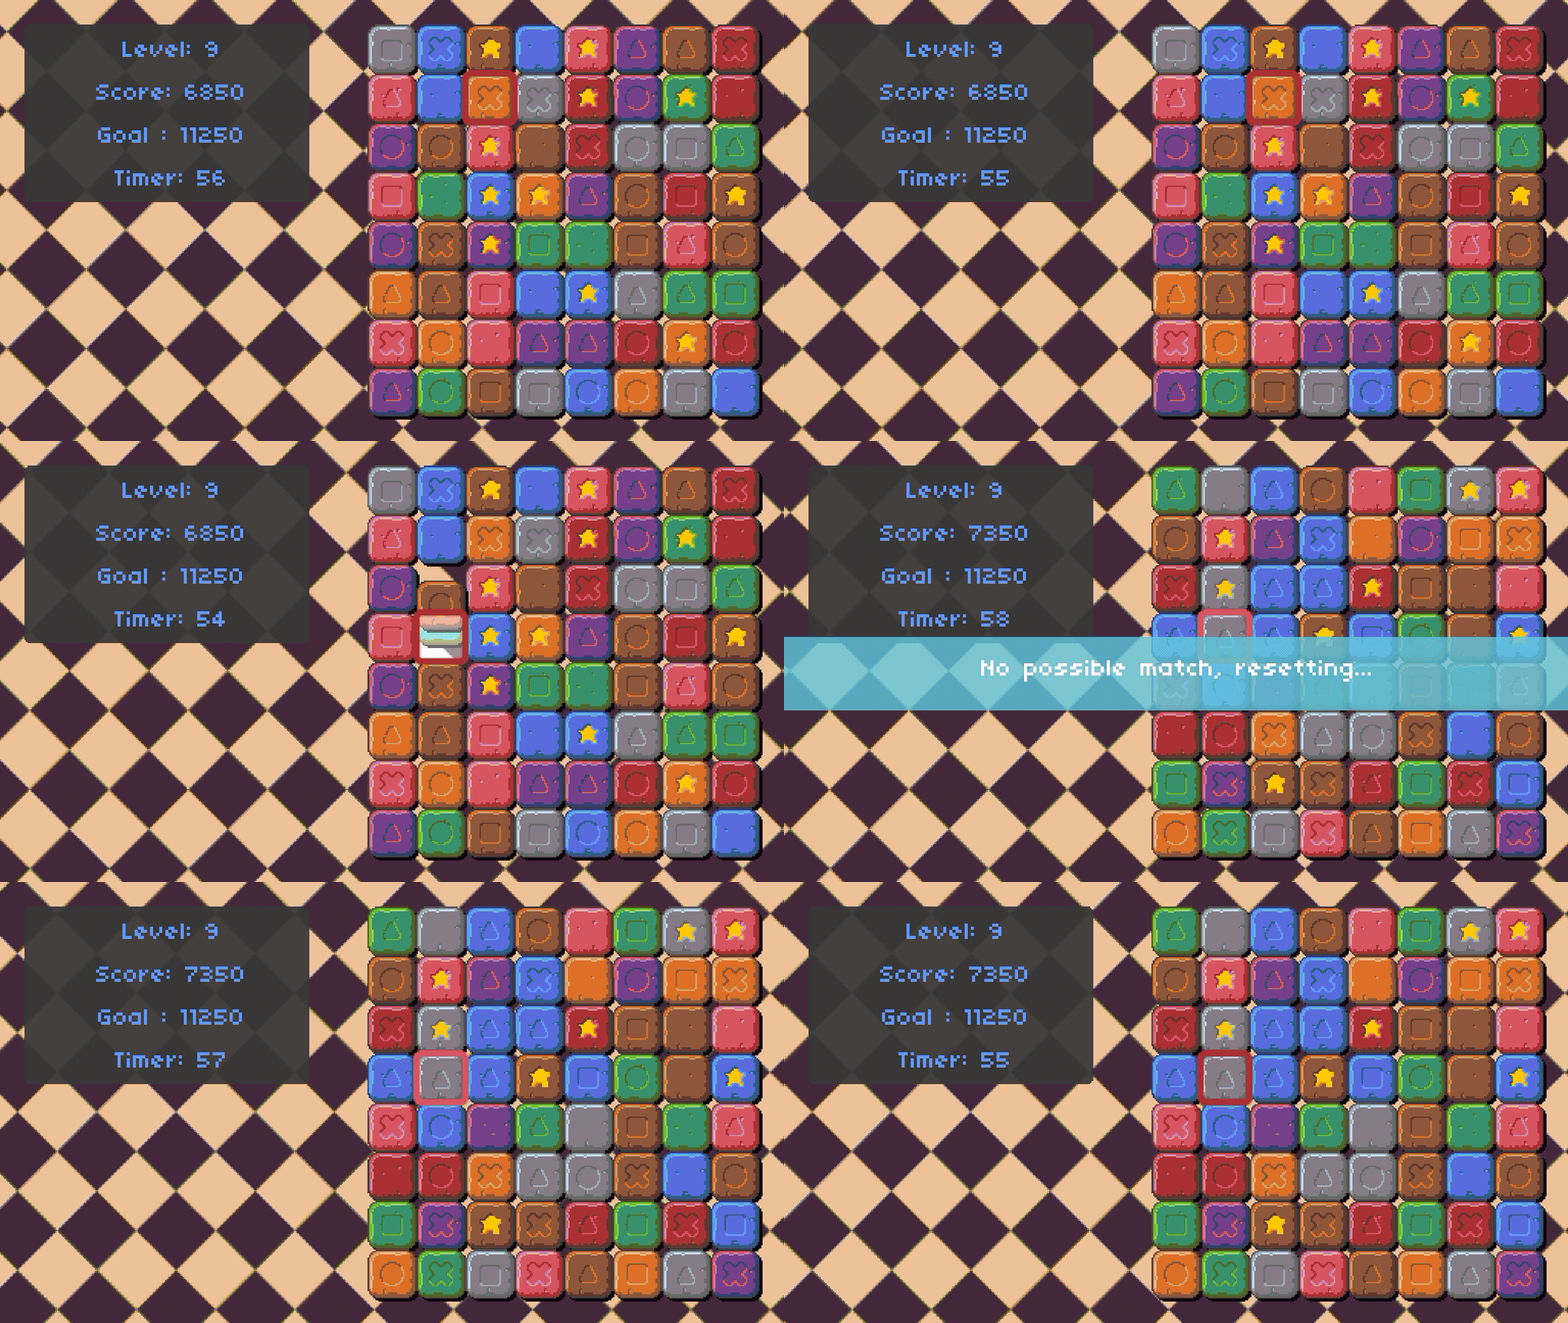 Reset the board when no match is available
Adding mouse input
Oh well, this is the optional part of the assignment and I should have done this first as it will make playtesting so much easier. Anyway, not much instruction was given for this task so I had to spend some time looking into the documentation to figure out what is the best way to add mouse input into the game. Drag-based implementation is probably the best way to experience this game but also considerately more work to do. Considering how I will most likely be the single person on this planet to play this game, I decided to go with click-based implementation.
I am posting the code below, so I won’t go into the details too much :)
Whenever a mouse button was clicked, Love2d will call the function love.mousepressed, and return the x, y position of the mouse cursor, and which buttons were clicked. All of these will be stored in a global table just like the keyboard input, and this table will be cleared at the end of every frame. Then, we can just use this global table to determine the input in any state.
If we have two methods of inputs, which one do we use to highlight the tile? Well, a Boolean variable self.isKeyboard can be used to keep track which input is currently active, and use it to highlight the tile. Whenever a button is clicked on either the mouse or keyboard, the value of this Boolean will change (mouse = true, keyboard = false). The rest of the code looks something like this:
-- use the mouse to highlight the tile when the keyboard is not active
if not self.isKeyboard then
    -- convert mouse position from screen to game
    local mouseCursorX, mouseCursorY = push:toGame(love.mouse.getPosition())

    -- convert to relative postion to the board
    local mouseCursorX = mouseCursorX - (VIRTUAL_WIDTH - 272)
    local mouseCursorY = mouseCursorY - 16

    -- only hightlight the tile if the mouse cursor is within the board
    if mouseCursorX >= 0 and mouseCursorX <= 255
    and mouseCursorY >= 0 and mouseCursorY <= 255 then

        -- convert to grid position
        local mouseCursorGridX = math.floor(mouseCursorX / 32)
        local mouseCursorGridY = math.floor(mouseCursorY / 32)

        self.boardHighlightX = mouseCursorGridX
        self.boardHighlightY = mouseCursorGridY
    end
end

-- when left mouse button is pressed
if love.mouse.wasPressed(1) then
    -- set keyboard input to inactive
    self.isKeyboard = false
    --[[
         similar logic to when a keyboard button is pressed
    ]]
end
 Level 1 - Mouse input | Level 2 - Keyboard input
Finally, I also changed the in-game cursor. This is a nice little addition that does not require much effort.
    cursor = love.mouse.newCursor('graphics/cursor.png', 0, 0)
    love.mouse.setCursor(cursor)
Overall, I am pretty satisfied with how the mouse input turns out and it works so much better than I expected. Excited for the next one because we will be working on Super Mario Bro! Don’t leave your seat and stay tuned for that.